
Choosing the right shipping box size is one of the fastest ways to lower shipping costs, reduce damage rates, improve unboxing, and cut packaging waste. A box that’s too big increases dimensional weight charges and requires more void fill; a box that’s too small raises breakage risk, crushes product cartons, and creates customer complaints. This guide shows how to right-size shipping boxes for real product types—especially bottle packaging, jar packaging, pump & dispenser, flexible packaging, paper boxes, cosmetic packaging, pharmaceutical containers, supplement packaging, and daily chemical packaging.
Why shipping box size matters more than you think
Right-sizing affects four critical outcomes:
- Shipping cost
Carriers often charge by dimensional weight, so extra empty space can cost more than the box itself. - Damage and returns
Oversized boxes allow products to shift; undersized boxes compress corners and weaken seals. - Packing speed and labor
Standardized, correctly sized boxes reduce packing time and mistakes. - Sustainability
Smaller, optimized boxes use less corrugated material and less void fill, lowering your packaging footprint.
Step 1: Measure your product correctly
Before selecting a shipping box, measure what you’re actually shipping, not just the primary container.
Measure the shipping unit
Depending on your product, the shipping unit may include:
- Primary packaging: bottle, jar, tube, pouch, pharmaceutical container, supplement bottle
- Closure: cap, pump, sprayer, dropper, reducer
- Secondary packaging: paper box, insert, tray, leaflet
- Protection: molded fiber insert, bubble wrap alternative, paper padding
- Bundles: sets, kits, multi-packs
Use the right dimensions
Always confirm:
- Length x Width x Height of the packed unit
- Fragile protrusions: pump heads, droppers, trigger sprayers
- Weak points: carton corners, glass shoulders, jar rims
Tip: For bottles with pumps, measure the tallest point including the actuator and any overcap.
Step 2: Decide your protection method first, then choose the box
A common mistake is picking a box size first and adding void fill later. Do the opposite: decide protection, then size the box around it.
Protection options that change box size requirements:
- Molded fiber or corrugated inserts for bottles and jars
- Paper cushioning for cosmetics and supplements
- Air pillows or recyclable void fill for lightweight non-fragile items
- Dividers for multi-bottle shipments
- Corner protection for premium paper boxes and gift sets
If you ship glass jars or bottles, inserts and dividers usually outperform loose fill because they prevent movement.
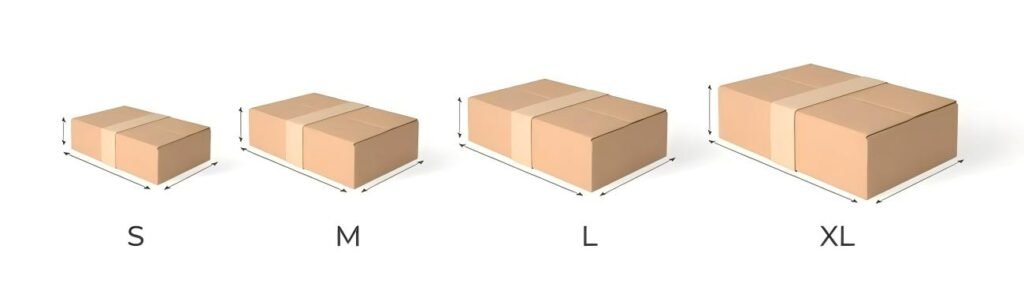
Step 3: Understand dimensional weight and how it impacts box size
Many carriers calculate shipping charges using dimensional weight, especially for lightweight products.
What dimensional weight means
If your box takes up a lot of space but doesn’t weigh much, you pay for the space.
To reduce dimensional weight charges:
- Use the smallest box that still meets protection needs
- Reduce box height where possible
- Avoid “one-size-fits-all” oversized boxes for small orders
- Consider multi-size box strategies for different order profiles
Practical example
If you ship a lightweight cosmetic set in a tall box with extra void fill, you may be charged as if the package weighs much more than the actual product. Right-sizing typically reduces cost immediately.
Step 4: Calculate the ideal internal box size
Shipping boxes are usually specified by internal dimensions. Your product must fit with protection included.
A simple sizing rule
Internal box dimensions should be:
- Product packed dimensions
- Plus protection thickness on each side
- Plus a small clearance for packing speed
For example, if your packed unit (product + inner carton) is 120 x 60 x 180 mm and you need 10 mm cushioning on each side:
- Internal length: 120 + 20 = 140 mm
- Internal width: 60 + 20 = 80 mm
- Internal height: 180 + 20 = 200 mm
Then add a small tolerance if your packing line needs faster insertion.
Avoid excessive clearance
Extra clearance means:
- more movement
- more void fill
- higher damage risk
- higher dimensional weight
Step 5: Choose the right box style for your product
Box style impacts strength, speed, and cost.
Regular slotted container
- Most common shipping carton style
- Strong and cost-effective
- Good for most e-commerce shipments
Full overlap box
- Extra strength on top and bottom
- Useful for heavy items or high stacking loads
- Helpful for glass-heavy shipments when using minimal inserts
Die-cut mailer box
- Premium unboxing, good for subscription boxes
- Works well for cosmetic packaging sets and branded experiences
- Typically needs careful sizing and testing for crush resistance
Step 6: Match box strength to weight and shipping conditions
Correct size is not enough. A right-sized weak box still fails.
Key strength factors
- Corrugate type: single wall, double wall
- Flute type: affects cushioning and stacking strength
- ECT rating or burst strength
- Humidity exposure in transit
- Stack height in warehouses and delivery vans
When you need higher strength
- Shipping heavy supplement packaging multi-packs
- Shipping glass jar packaging or bottle packaging
- Shipping dense daily chemical packaging like detergents
- Long-distance or international shipping
- High return rates due to crushed corners
Right-sizing often lets you maintain protection while avoiding over-specifying strength, but fragile products still need reliable structural performance.
Step 7: Right-size for multi-item orders and kits
If your average order includes multiple items, use a multi-SKU box plan.
Common box plan approach
- Small box for 1 item
- Medium box for 2–3 items
- Large box for 4–6 items
- One specialty box for kits or gift sets
This reduces void fill and dimensional charges without creating too many box SKUs.
Use dividers for bottles and jars
For multi-bottle orders, dividers reduce clinking and breakage better than loose void fill. This is especially important for:
- glass bottles
- droppers
- pump bottles with tall actuators
- jars with heavy caps
Step 8: Product-specific sizing guidance
Bottle packaging
Best practices:
- Use inserts or dividers to stop vertical and side movement
- Ensure headspace above caps and pumps is protected
- Avoid tall boxes that let bottles tip during transit
If shipping pump bottles, consider a slightly taller box with top stabilization rather than loose void fill.
Jar packaging
Best practices:
- Protect the rim and shoulder area
- Prevent jars from contacting each other
- Use molded fiber trays for premium sets
Glass jars often need tighter control of movement than bottles because impact concentrates at the rim.
Pump and dispenser products
Best practices:
- Stabilize actuators and triggers
- Prevent side pressure that can crack closures or deform pumps
- Consider shipping pumps separately for very fragile assemblies in bulk B2B shipments
Flexible packaging
Best practices:
- Pouches can shift and crease; reduce empty space
- Use a snug mailer box or right-sized carton
- For liquid pouches, add secondary containment to prevent leakage damage
Paper boxes and secondary cartons
Best practices:
- Avoid compressing premium cartons; add corner clearance with inserts
- Use mailer boxes sized to prevent rattling but not crush corners
- Consider double-wall for high-value gift sets that must arrive perfect
Pharmaceutical containers
Best practices:
- Maintain pack integrity and labeling readability
- Avoid overpacking that causes scuffing or carton deformation
- Use consistent box sizes to support serialized shipping workflows where applicable
Supplement packaging
Best practices:
- Heavier bottles need stronger bottom support
- Use inserts for glass supplement jars
- Tight sizing reduces label scuffing and cap loosening
Daily chemical packaging
Best practices:
- Prioritize leak prevention: seals, torque, liners
- Use snug cartons to reduce drop impact velocity
- Consider absorbent pads or containment for high-risk liquids
Step 9: Validate your box size with real shipping tests
Right sizing should be verified with testing, not guesswork.
Minimum testing checklist
- Drop tests from realistic heights
- Vibration simulation or rough handling evaluation
- Compression tests for stacking strength
- Temperature and humidity exposure if relevant
- Leak tests for liquids
A box that “fits” on a table may still fail after a carrier drop or compression under other parcels.
Step 10: Reduce costs and waste with a right-sizing workflow
A repeatable process makes right sizing scalable.
A practical workflow
- Group SKUs by packed dimensions and fragility
- Define 3–6 standard box sizes to cover 80–90% of orders
- Assign each SKU a default box size and protection method
- Set maximum allowed void space rules for packers
- Track damage rates by box size and refine
What to track
- Dimensional weight cost per order
- Damage and return rate
- Void fill usage
- Packing time per order
- Customer feedback about “too much packaging”
Common mistakes to avoid
- Choosing one oversized box for all orders
- Measuring only the bottle or jar and forgetting pumps, caps, or cartons
- Using loose void fill for glass without stabilization
- Ignoring dimensional weight pricing
- Underestimating humidity and stacking crush during peak seasons
- Over-tight boxes that crush paper boxes and cause premium-pack damage
FAQ
What is the best shipping box size for e-commerce
The best size is the smallest internal box that fits your product plus necessary protection, with minimal void space to prevent movement and reduce dimensional weight charges.
How much empty space should be in a shipping box
As little as possible while still allowing protective materials to work. Too much space increases movement and damage risk; too little space compresses cartons and weakens seals.
Should I use inserts or void fill
For fragile items like glass bottles and jars, inserts or dividers usually provide better protection than loose void fill. For non-fragile items, void fill can be sufficient if the box is right-sized.
How do I reduce shipping costs without changing my product
Right-size your boxes, reduce dimensional weight, standardize a small set of box sizes, and improve internal protection to cut damage-related replacement costs.
Shipping boxes and complete packaging solutions from Supply-Packagings
Supply-Packagings provides supply packagings for everything, including Bottle Packaging, Jar Packaging, Pump & Dispenser, Flexible Packaging, Paper Boxes, Cosmetic Packaging, Pharmaceutical Containers, Supplement Packaging, and Daily Chemical Packaging. If you want to reduce shipping cost and damage with the right box size, we can help you design a complete packing system—outer carton, inserts, and product packaging—optimized for dimensional weight, protection, and customer experience.
Share your product type, packed dimensions, average order mix, shipping regions, and breakage/leak history, and we’ll recommend practical box sizes and protective packaging structures for your operation.